how to build a custom fiberglass sub enclosure:
|
i get the question "how did you make your sub-box?" all the time. i wrote up this quick web page to try to give instructions. this is how i built the box for my 98 vw gti, but you can probably apply this method to any vehicle. click the small pictures for a large version. |
*all pics with borders can be clicked on for larger versions.*
i found most of this stuff at walmart auto dept. and home depot.
heres the materials list:
*aluminum foil [$5}
*aluminum foil duct tape [$10]
*fiberglass resin/hardener (buy the big size) [$25]
*fiberglass cloth / matting (the matting is
thick so its doesnt take as many layers, the cloth gives a smoother finish.
i used some of each) [ $3 per pack, 2-3 packs required]
*bondo glass / hardener (basically bondo with fiberglass
- regular bondo will probably work) [$8]
*paintbrushes (2" is a good size..get at least 3
as they have to be thrown
out after 1 use. buy cheap ones) [$5]
*a piece of MDF ( lowes/homedepot all you
need is @ 2' x 2' so dont buy a realy big piece found one like 2' x 4')
[$6]
*silicone caulking [$3]
*gloves lots of latex disposable gloves......its
going to get very very messy. [$?????]
*dust mask (or bandanna around your mouth and nose...seriously
do something to protect your lungs) [free]
*2 ft square or larger piece of cardboard [free-scrounge
around]
*jigsaw is a very helpful thing ...i didnt have
one when i built my first box, so i used an attatchemnet for the dremmel
which made it into a rotary saw. the jigsaw is much easier and faster.
[$40]
*carpet or cloth to cover the board (you could probably
paint it but i think it would be more trouble than it would be worth in
the end) [@ $10 a square yard]
*a speaker wire cup. ( you know the thing
where you run wires to the box. i had to go to radio shack for this)
[$5]
*a cup or small mixing bucket you dont care if gets
completely ruined [$0.64 at home depot]
total is almost $70 in materials......still much cheaper than
the jbl stealthbox or vantage enclosures.
total time : @15 hours over 2 or 3 days ...possibly could be done in
one day.
instructions:
1) Making the box:. remove bottom carpet and open your windows or youll be breating fumes for days. use the aluminum foil duct tape and tape directly onto the trunk liner where the sub box is going. make sure to get a good layer with no holes cause the glass resin will stick to the carpeting an you will never get it up. i made a cup of foil around the seatbelt roller to make sure it would still have room to work properly. i also used aluminum foil to keep from getting resin on other parts of the car.
2) cut some small strips of the matting/cloth {6 or 7 in x 4 or 5 in)> no w is a good time to use gloves and a dust mask. mix your resin up per instructions. dip the pieces in resin and slap em onto the the foil to build the first layer. its hard to get the pieces to hang onto the sides so i used a paintbrush to put extra resin over the pieces and sometimes i had to hold them in place for a few minutes. work quickly cause the resin sets up fast. bring the glass out a little farther than the box will come, you will trim the extra off later. i didnt do the top at this time becuse there was nothing to stick it to. after the first layer is done let it dry for a while.
3) once dry, the box should pull out of the space. take it to somewhere you can work , set it so it opens toward you (put down some aluminum foil because you will be doing more glasswork once the sub is out of the car). to do the top of the box i cut a piece of matting big enough to cover the gap and dipped it into resin and simply stretched it across the top. start adding more layers, look for thin spots/holes and make sure to fill them in good. i used paintbrushes to apply layers of resin over the matting/cloth.
4) once you have 3 or 4 layers and everything looks good and thick then you can see how it lines up with your mdf. you will have little flanges of glass that you will need to cut off. a pair of scissors works. test fit in your car and make sure its gonna fit right . just trim the glass untill its gonna fit good in the car. i made mine so the box would come to the edge of the "shelf" behind the wheel well.
5) look for leaks in the glass...best way i have found to do this is fill it with water...mark everywhere water comes through and reseal those places with resin or bondo glass
6) making the baffle: once your glass part is cut to size you
can start making the baffle. use cardboard and make atemplate for the mdf.
i kept cutting the cardboard down untill it would fit just inside the glass
portion of the box. when you get a good template trace the
outline on your MDF and cut it out. when cutting the curved side
of the board (wheel well area) it is a good idea to cut at an angle to
get a good fit.
7) cut the hole for your speaker( speaker you kinda have to just figure the best place for this to get max mounting depth.)
8) cut the hole for the wire cup . i put my wire
cups on the top of the box for a cleaner install look. in my pic a layer
of bondo glass has been applied to get a good airtight fit.
9) time to attach the board to the glass. i used silicone to seal all the way around the glass/board junction on the inside and outside, and all around th wire cup. i also used a few screws to hold the baffle in place. i then used bondo glass (it has bits of fiberglass in it, plain bondo would probably work too) to insure a good seal. i just mixed it up and smeared it into the cracks around the board glass juntion and over the edges onto the glass. let this whole thing dry
10) put your sub in and connect all the wires. the box sahould be close to airtight. try it out...listen for rattles and resonance. this usually means thin glass. i just put more resin into the thin spots and let dry. then try it again. mine sounded like crap at first and then i got some insulation out of the attic and put it into the box and it sounded great.
11) as far as anchoring the box i havent had to do this.
by making the top of the box fit flush with the plastic hatch holder i
was able to use that to hold in the enclosure. i had to cut out the
ribs of the hatch cover holder however...

12) carpet, upholster, or paint the board and voila! your done. i went to a local stereo shop and thaey gave me a scrap piece of carpet big enough to cover it. unfortunately i had to use charcoal carpet for my box as i couldnt find any black when i was doing this.
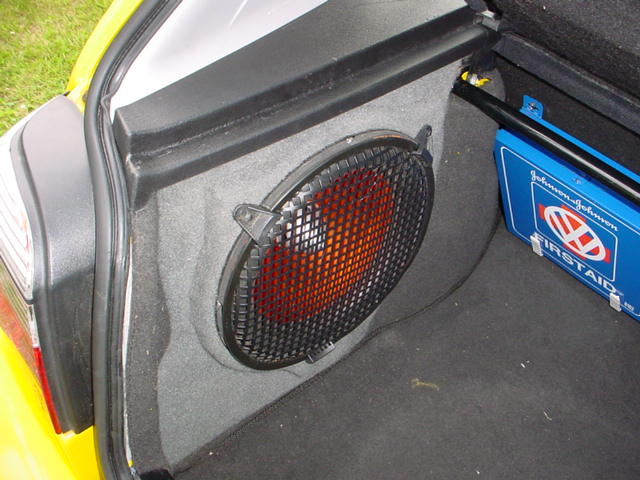
13) unfortunaltely if you are using a sub with a greater mounting
depth than @ 5.25 inches you will need a spacer ring. this can just
be cut out of mdf. i cut mine with places to attatch a grill and
then carpeted it.
![]()
the box is @.8 -.9 cu ft with insulation i estimate its 1 - 1.1 cu ft apparent volume with insulation.. this is good for most sealed 12's but check your woofer's literature. i have also built a 10 inch version of the box for a customer. he ended up going with a infinity 100.1 se and says the sound is better than he expected. i had a sony xplod 12 that sounded real nice and i recently bought a cadence ud 12 that sounds very deep and tight. i hope this explains everything pretty well i tried to make it as detailed as i could, but if you have any questions just hit me at kobalt@hotmail.com and i will try to get back with an answer asap.
alright now for some picture of the box:
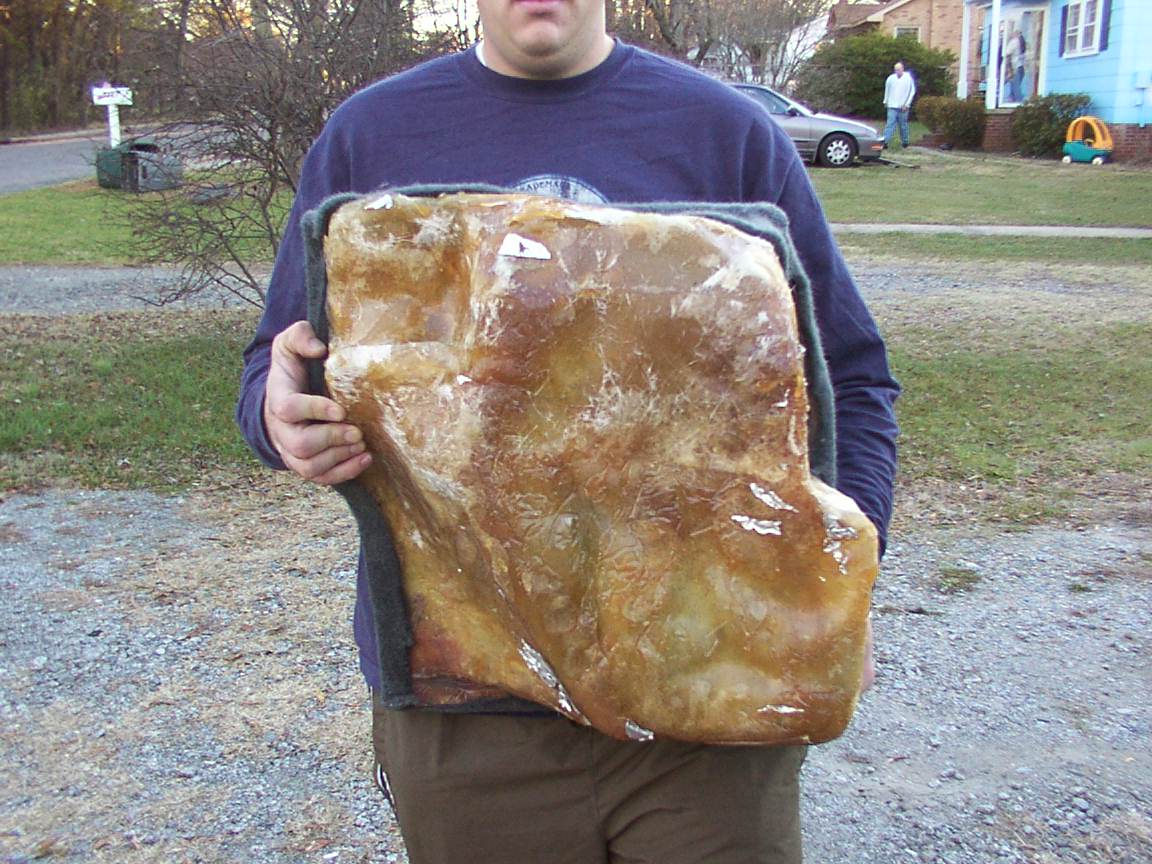 |
back of box. note area for seatbelt mechanism in upper left corner and tail light area in lower right corner. also note curved area on left side to accomodate wheel well. |
 |
left side (when viewing from front) note bulge is area below tailight assembly. |
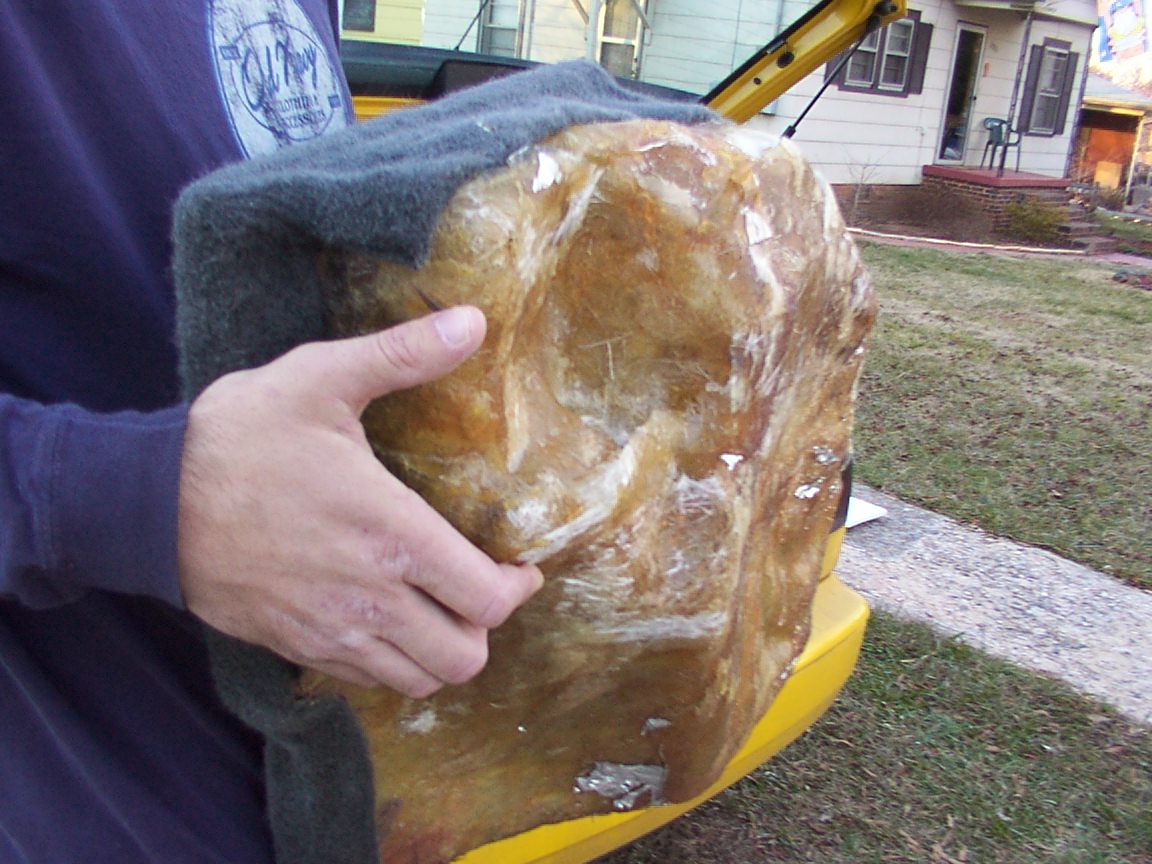 |
right side (when viewed from front) note "cut out" space for seat belt mechanism. also note curved area for accomodation of wheel well. |
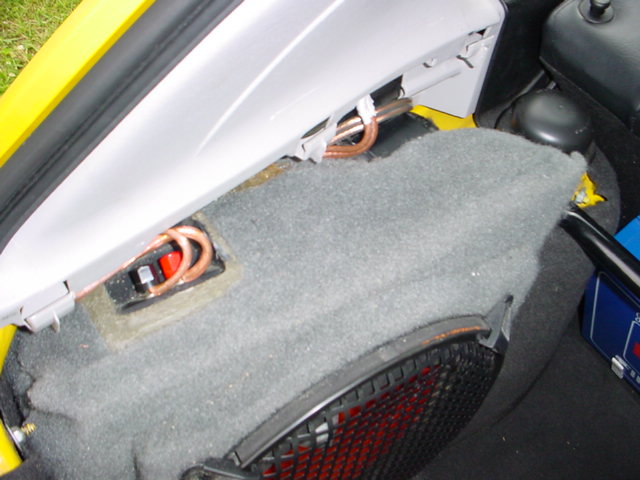 |
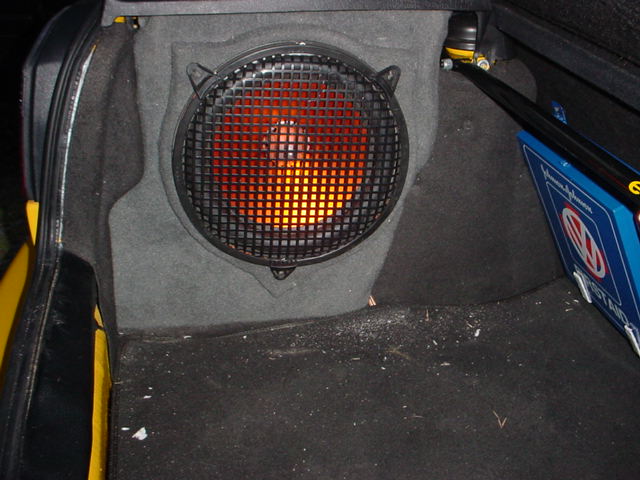
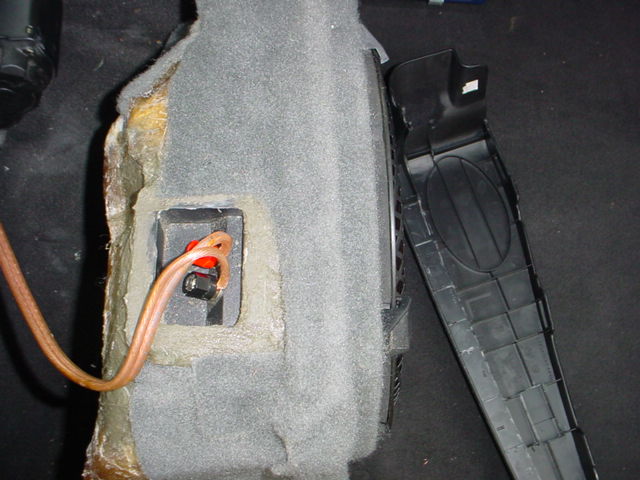
view of top of box when mounted in car. |
 |
box built for a customer. 10 inch infinity, no need for spacer ring. looks good, sounds great. |
 |
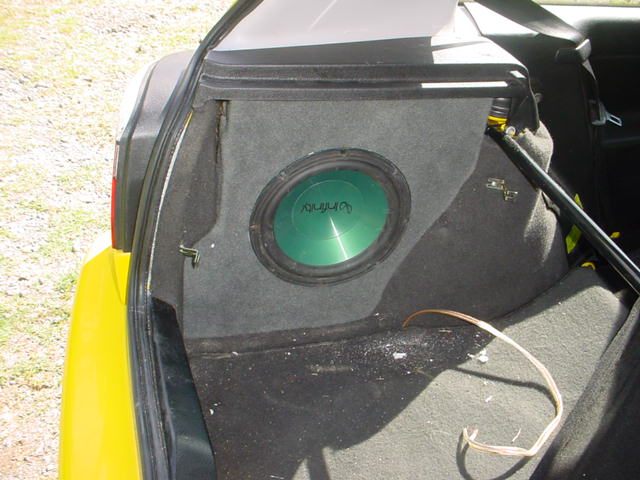
another pic of my personal box. you can see the flush fit from this angle. access to spare tire is increased (no need to remove box to pull carpet) |
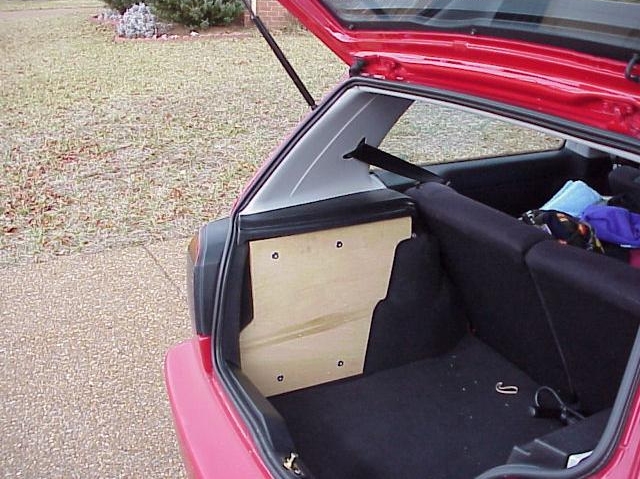 |
this was sent to me by a fellow vortexer. it shows a board designed to be an amp mount. the shape is a little different from my enclosure and im not sure how deep this mounts into the cavity. it looks as though this could be converted into the front of a sub enclosure though. a detailed diagram for this can be found here. |
more pics of my car: here
where to find me: forums.vwvortex.com
username: redstar
generally post in
gIII/jIII and southeast forums